Followers

Friday 29 December 2017

Merry Christmas

Merry Christmas!


I would like to wish everyone where-ever you are a very Merry Christmas and a Healthy & Happy New Year!!

  This card I made for my partner and I used the beautiful papers from Maja Design Joyous Winterdays you can find it here  love these papers 😉 I made the large poinsettia using red mulberry paper using sizzix poinsettia die. I have also used wooden snowflakes and chipboards and lots of hessian ribbons as its for the bloke so its not too girlie lol 


Have the most wonderful day and hope you like my card.

I would like to enter my card into -


Wednesday 20 December 2017

CGC Challenge 154 - Anything Goes


Challenge 154 - Anything Goes


Hi! Welcome to a new week here at Crafty Gal Corner  with a this week challenge- Anything Goes. Our fantastic sponsor is Faery Ink and the Prize is 3 Digital Images!

I have used Arielle Ice Skater Oopsie .... isn't it cute 😉 and I coloured it with Copics and some Unicorn Glitters. I used Doohickey Rounded Frame to die-cut the topper and matted it on Craft & You Design Paper die-cut by Doohickey Recipe Card Die.


I cut the base card with GoKreate XXL Frame Frilly 9 and matted it with Craft & You Design - White Christmas and I added the Winter Wishes Icicles by Joycrafts and Let it Snow by Florartistry


That's it folks! It's a clean and simple card for me this time which is usually for me lol but less is more sometimes 😊 I hope you will join us at Crafty Gals Corner  and show us your creative creations!


I would like to enter my card into -


Monday 18 December 2017

Skiing Tilda & Skiing Edwin Christmas Shaker Ornaments

Let’s Craft and Create Challenge 132 - Anything Christmas Goes  

Skiing Tilda and Skiing Edwin shaker ornaments


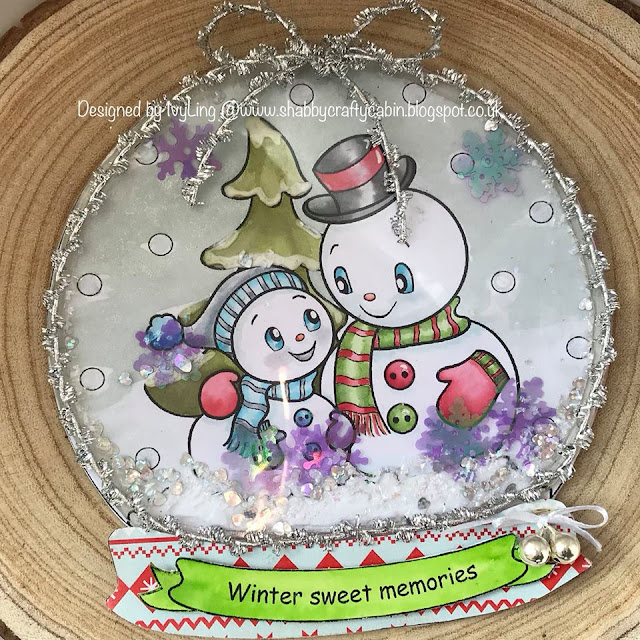
Today is our reminder for Challenge 132 - Anything Goes ( option Christmas) at Let's Craft and Create and I hope you can join in and share your creations with us. Here is my DT inspiration for the reminder - 2 hanging shaker ornaments using Skiing Tilda and Skiing Edwin which I coloured with Distress Inks and cut out by hand.


The frames are cut using Just Cutz stitched circles dies with holographic silver cardstock. I used white cardstock for the background and blended it with weathered wood and tumble glass distress inks 

I die cut a round white cardstock the same size as the frame and tore a strip to make hills and I adhered wet glue all over it and added some glitter flakes and stuck to the background with foam pads.


The houses and clouds were cut from Snowglobe by Tim Holtz Dies and coloured by Distress Ink and the Trees from Sue Wilson Creative Expressions which I coloured by Distress Ink and added glitter flakes


That's it! I hope you like them 😉

I would like to enter my projects into -


Friday 15 December 2017

Magnolia-licious December Blog Hop


Hello Hello Hello .....!!! I am super excited today!!!

We decided to have a surprise Blog Hop over at the Magnolia-licious Challenge Blog and there is a great prize involved, Pop Up Box #2, from Farm to Market. This box is full of various stamps, dies and laces. The theme is from Farm to Market from Magnolia Sweden.

How do you get the chance to win this fabulous prize?? ..... easy ....

You will need to go to each person on the Design Team to get details of their makes, and collect the 1 red letter on each blog as well as leave a comment. When you have finished looking at them all, Maya is the last stop, collect her 1 red letter and figure out what Christmas word we have scrambled and comment the answer on Maya's post.
To be in for the win of the blog hop, you must leave a comment on each person's blog, and guess the correct word on Maya's post! 
Ivy - you are now here 😃
Kerri - your next stop


Here's my project for the Blog Hop -
 Foamiran Flowers Shabby Chic Wintry Birdcage


I altered this lovely metal birdcage with foamiran roses and poinsettias with some gorgeous microbead stamens and microbead berries all of which you can find in Shawn's store here. There are some lovely new products just arrived make sure you check them out.


I started by taking the back panel off and used rust patina paint to touch up here and there and then the cage as well. Then I used some modelling paste over a stencil to create some textures. When its all dried I begun to assemble my flowers and embellishments.
I have added silver glitter acrylic paint to the petals and leaves and also glitter snow paste 
The Lantern and metal word plates are from Tim Holtz 


Aren't these birds cute? They are from my stash and  I made the nest with sisal and a couple of polystyrene eggs for these love birds 😀
   

I have added a lot of aquamarine natural moss and art stones and snow glitter paste here and there to set a wintry look 😉


I hope you like my project.
The letter I have for you to collect is "s". Kerry is next, don't forget to leave a comment to be in for the prize😀

This Blog Hop will end on Sunday at midnight (EST)
Make sure you come back on the Magnolia-licious Challenge Blog to see who the winner is on Monday Morning!

Good Luck to everyone and have fun!! 

Merry Christmas, 

Love from,
Ivy, Kerri, Karen, Rosette, Rene, Maya, Shawn, and Kim

Wednesday 13 December 2017

Anything Goes CGCC#153

Christmas Snowsphere  

SnowGlobe Shaker for Crafty Gals Corner Challenge #153 

Hello again!    Hope you have had a good week and getting all those bits ready for Christmas? Not too long now ..lol. Over at Crafty Gals Corner Blog we have a new challenge this week again the theme this week is Anything Goes. Our Sponsor is -  

                               Alicia Bel                                       and                      Lia Stampz
Image result for alicia bel digital image                      
                         Prize- 10 Euros                                                           2 Images DT used

I have chosen the image Christmas Snowsphere by Alicia Bel .... its calling out for for a shaker card... don’t you think lol and that’s what I have made! 😀 I printed it out about 6” in size twice and coloured one with Copics


I would like to enter my card into -


Wednesday 6 December 2017

Anything Goes CGCC #152

Steampunk Telsa Mixed Media Canvas 

DT project For Crafty Gals Corner Challenge #152 Anything Goes   

Hello! Another week has come and gone and we have seen some beautiful projects by so many of you at the Crafty Gals Corner Blog last week...congratulations to the winners! We have a new challenge for this week and the Theme is Anything Goes... an easy and favourite for most of us! We have two great Sponsors -  

Nikki Burnette                       and                    Conie Fong

                           
Prize- 3 Digital Images                                     Prize - 3 Digital Images

I have chosen Telsa by Nikki Burnette and I have thoroughly enjoyed colouring her with Copics and printed her out about 6” long because I had in mind what I wanted to do when I saw the beautiful image. I created this 12” x 6” deep canvas in steampunk theme. The long process in creating this project so I will not go into details  but if you would like to fid out please leave me a comment I would be more than happy to tell you.


I have used Prima Marketing Dark Velvet Art Alchemy Acrylic Paint, Color Bloom Sprays and Antique Brilliance Wax. Chipboards and metal embellishments. Fabric flowers are from Prima too


I hope you like it as much as I do and I would love to hear your comments. Thank you for visiting, hope to see you again. x

Merry Christmas Tilda Snowy Hug

Tilda Snowy Hug

Hello crafty friends, thank you for dropping by my cabin. It's December and Christmas is less than 3 weeks away, are you ready for it?? I am certainly NOT lol but must make a start soon.... this is one of the cards I have started...

I used Tilda Snowy Hug and coloured her with TH Distress inks then I die-cut her out with Doohickey Lace Coaster Die Set. The base card is made using the frame die from VintageBox 1. Papers used are from Maja Design-Joyous Winterdays , you can find in Shawn's store here  I made the white poinsettias using white foamiran with varieties of green stamens and the leaves with olive green foamiran, you can find the products here in Shawn's store


I also used loads of embellishments - round wooden chips, cinnamons, white frosted berries, pine cones and pine branches, lace and pearl strings all from my stash


Dies used are Doohickey Slender Firs, VintageBox 1 Envelope Die and Doohickey Lace Coaster


To finish the card, I heat embossed with shabby white enamel frontage and a touch of snow paste 


I hope you like this card, would be nice to hear from you 😉


I would like to enter my card into -


Foamiran Poinsettia Step-Out Tutorial


Hi!

Today I am showing you how I made my poinsettias in an easy step by step tutorial... hers's my card which I used white foamiran and green stamens instead but techniques are the same , you can find these gorgeous products in Shawn's store you must check out the new stock of stamens and berries too! They are to die for 😋


Cut 2 of the larger template and 1 of the small template. You can use the Whimsy Stamps Poinsettia Die but at the moment in time I haven’t got them. If you have any poinsettia dies, you can do the same 


Use a craft iron or normal iron and mine is on Cotton setting, each iron may varies so it’s best to test it first. The petal will curl, then I do a concertina fold and roll it between my fingers


Continue to do this to all the petals and they will look like this 


Then I gently unfold the petal only on the wider part and use a ball tool on a sponge and press until it looks like this 


Do this to all the petals like the picture below


Put a drop of hot glue to the centre - domed petals up - and off-set the next petals on top and the same to the smaller petals.


Use a 5mm ball tool or a wooden stick and press down on a sponge


Then I used a pokey tool to make a hold in the centre for the stamens 


I used about 10 double-head stamens and pushed them through 


I put hot glue on the back side of stamens to secure them and trimmed off the excess stalk. You can have your poinsettia as it is. I made mine shabby by adding some glitter paint but it’s optional, it’s my style 😊 


Hope you like them and give it a try .
For more details on my card above please visit my blog - www.shabbycraftycabin.blogspot.co.ukhttps://shabbycraftycabin.blogspot.co.uk

Midweek Magnolias #179 Anything Goes

Poinsettia Tilda

This is my DT card for Midweek Magnolias Challenge #179, hope you can pop over and join in and share your creations with us. The lucky winner get a surprise package from our fantastic Sponsor - Magnolia Sweden


For my image I am using Poinsettia Tilda and coloured her with Copics. The base card was die cut using Doohickey frame from VintageBox 1. I used Prima mulberry papers and Anna Marie Designs christmas collection for the matting and layering. The aperture is cut out of the Early Bird Die from VintageBox 4. The scroll and tag on the base are from Doohickey Vol.7 and the envelope from VintageBox 1 ( I hunted high and low for the old vintageboxes and love them lol) oh I nearly forgot the foliage die cuts are from Doohickey Vol.7 too 😊


I made the foamiran poinsettias and added some silver glitter white paint and splatters to give it a sparkle


Well I hope you like my card and inspire you a bit to join in our challenge 😉 I will see you on the other side then lol please feel free to leave me a comment which I would appreciate very much!

I would like to enter my card into -